
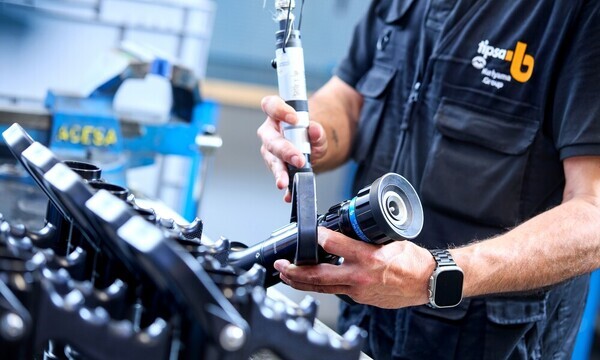
Proper nozzle maintenance starts with knowing how to disassemble your equipment correctly. This step-by-step guide walks firefighters and equipment officers through the full disassembly process of the TIPSA Viper, part of the TIPSA–Kuriyama Group firefighting nozzle range, fitted with a Blue Devil selectable tip.
A firefighting nozzle is only as reliable as the maintenance behind it. For fire departments and emergency response units, knowing how to disassemble a Viper nozzle is a fundamental skill: it enables field inspections, part replacement, and peak performance when every second counts.
Why regular nozzle disassembly matters
Debris, scale buildup, and worn seals are among the most common causes of nozzle failure during firefighting operations. Routine disassembly lets teams inspect the internal ball valve and strainer, replace O-rings before they fail, and clean components that affect flow rate and stream pattern.
Step-by-step: disassembling a TIPSA Viper nozzle
- Safety first. Shut off the water supply and fully depressurize the hose line. The valve lever must stay in the CLOSED position for the entire disassembly process.
- Remove the tip. Rotate the tip selector ring counterclockwise to release it from the barrel, then set it aside on a clean surface.
- Release the barrel. Using a hex key, remove the retaining set screws that lock the front barrel to the valve body.
- Slide off the barrel to expose the ball valve assembly.
- Extract the ball valve and inspect it for pitting, scratches, or debris that could compromise the seal.
- Remove the strainer screen and check it for clogging or damage that could restrict flow.
- Remove all O-rings and seals, checking for wear, brittleness, or deformation.
- Clean every part with fresh water. Avoid chemical solvents, which can degrade rubber components.
- Reassemble in reverse order, seating each component firmly, then cycle the valve open and closed to confirm smooth operation before returning the nozzle to service.
Frequently asked questions
How often should a fire nozzle be disassembled for maintenance?
-
TIPSA Kuriyama recommends a full disassembly inspection after every major operation and at minimum once every six months as part of a scheduled preventive maintenance program.
What tools are needed to disassemble a TIPSA nozzle?
-
Most TIPSA nozzle models are designed for tool-free disassembly, the modular design allows trained personnel to complete the process by hand, reducing time in both field and workshop settings.
Where can I find spare parts for TIPSA Kuriyama nozzles?
-
Genuine replacement parts, including O-rings, baffles, and tips, are available directly through TIPSA's authorized distributor network and at tipsa.com.
Learn more about TIPSA Kuriyama firefighting equipment